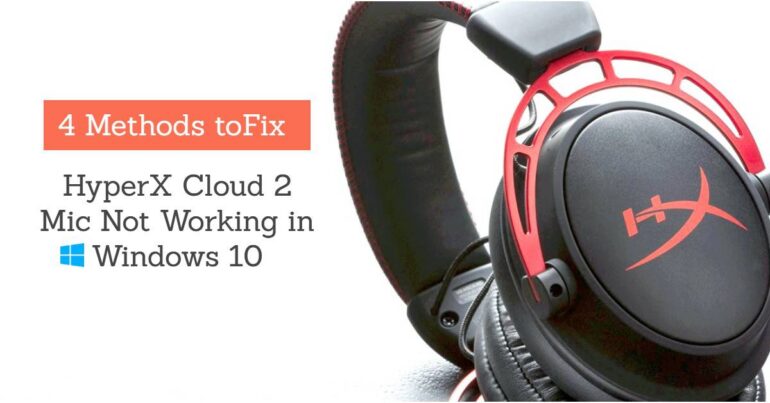
[Fix] HyperX Cloud 2 Mic Not Working in Windows 10
Has the mic on your HyperX cloud 2 stopped working? You are not only the one who is facing the problem. This is the common problem faced by many HyperX cloud 2 headphone user.
In many cases the users gots the faulty headphone while in other cases it is just a software issue. Don’t worry we can fix HyperX cloud 2 mic not working issue if it is caused by software or outdated drivers.
HyperX headphones has acquired a unique place among the gamers and streamers. The reason behind this huge popularity is quality and toughness of the headphones. These headones are a good choice to play online games like Player Undergroud Battle, Counter-Strike, Call of Duty and much more.
Fix Hyperx Cloud 2 Mic Not Working Problem
There are few reasons behind HperX cloud 2 mic not working. If you brought a new HyperX headphone and mic is not working may be you got the faulty product or you have not properly set up it.
Also Read | 10 Best Music Player for Android to Rock On Life (Free)
Sometime Hyperx Cloud 2 Mic also stopped working because of the outdated driver version. Well in this scenario i will help you to fix this issue. To fix mic not working issue we need to troubleshoot with all three methods which include:
- Troubleshoot common problems with a headphone.
- Try checking the sound setting of headphone
- Updating the headphone drivers to latest version
Solution 1. Troubleshoot Common Problems with Headphone
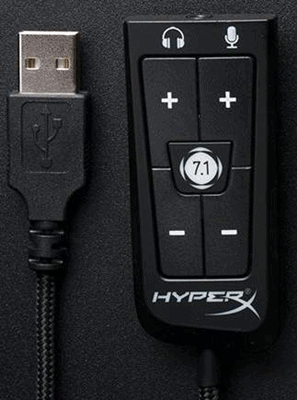
First of all check the headphone and mic connection with the computer. Check that headphone wire is properly connected to the computer’s output port which is in green color and mic wire is connected to red color port which is our input port.
If you are still facing the problem check weather wires are not faulty or damaged. If not then try pressing the mute button on your headphone. Sometimes it is pressed by default and muted.
Hope now the HyperX cloud 2 mic not working problem is solved. If your hyperx cloud 2 mic is still not working then it might be an improper sound setting issue. See below method for fixing these issue.
Solution 2: Configure Proper Sound Setting
In this metjod i am going to check the windows sound setting for headphones and try to manually configure it. If the manual configuration does not work will will reset the sound setting to default which will enable the headphone.
Must Read | 10 Best Ethical Hacking Tools in 2020 For Windows, Linux & Mac OS
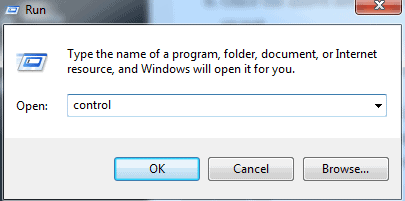
Step 1:To do this simply press Windows+R button and type the Control Panel in the search box. Now hit the search button.
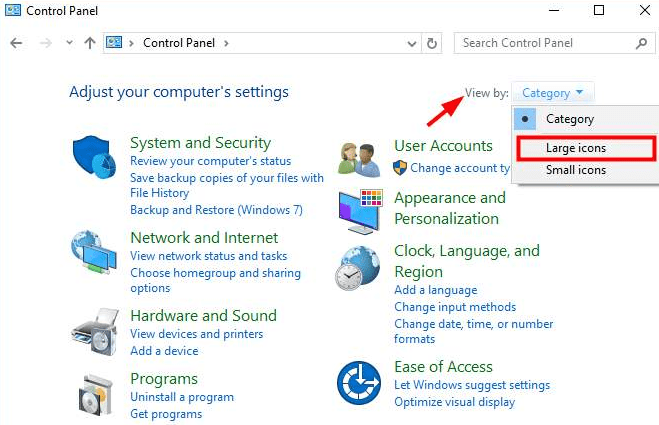
Step 2: It will now open the windows control panel from here choose the Large Icon button from the dropdown menu to simplify control options.
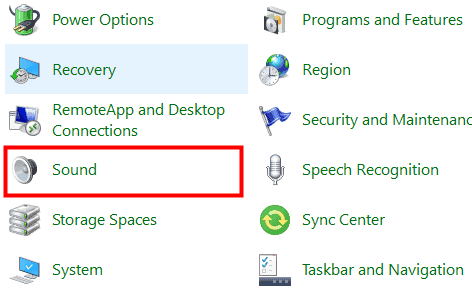
Step 3: Now click on Sound from here.
Step 4: Select the Recording tab, then right-click on any empty place inside the device list and tick Show Disabled Devices.
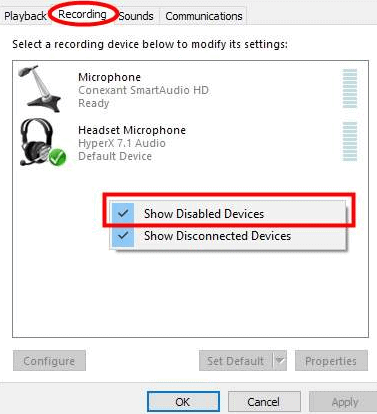
Step 5: Now use right-click on Headset Microphone to enable it. Once enabled again right-click on it and set it as the default device.
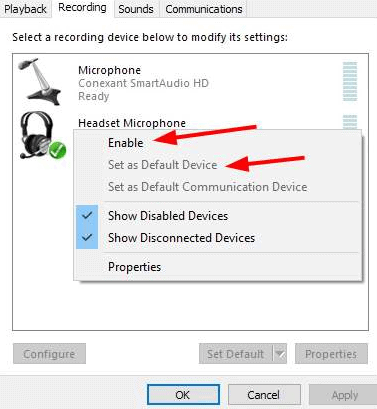
Once the above setting is done. Restart your computer and check hypex cloud 2 mic wheather the problem has been fixed or not.
Solution 3: Update Hperx Cloud 2 Drivers using DriverEsasy
If the problem of hyperx cloud 2 mic not working has not been resolved yet, then its time to update the drivers. Sometimes this works in case your Hyperx cloud 2 drivers are outdated or has been corrupt due to some registry issue.
To fix this issue there are two methods. One is to automatically update hyperx cloud 2 drivers with the help of DriverEasy which is best software for updating outdated drivers in windows.
Read Also | 7 Best Xbox Emulators for PC to Play Xbox One Games
And the second method is to manually update the drivers with the help of Windows device Manager. For simplicity the procedue we will first go to try automatic driver installation using DriverEasy.
Step 1: First of all download and install DriverEasy
Step 2: Now open the driver easy application and click on run scan. It will automatically find all outdated drivers on your PC.
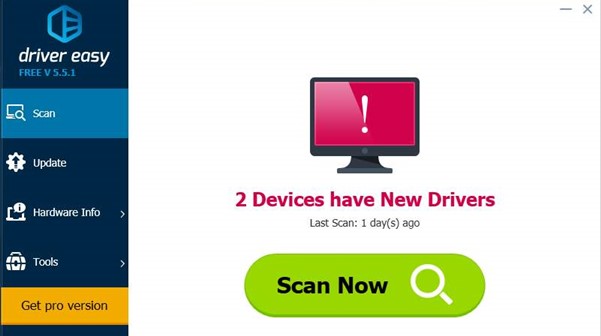
Step 3: Now find the Hyperx Cloud 2 headphone from list and click on update drivers.
If you have a pro version of DriverEasy you can also click on update all driver in single click. Now wait for the update process to complete. Once drivers have installed restart you Pc and check again the hyperx cloud 2 mic.
Solution 4: Update Hyperx Cloud 2 Drivers Manually using Device Manager
If the automatic method for installing the Hyperx Cloud 2 driver using driver easy not worked for you. You can try this manual method from here.
In this method we are going to update drivers using windows device manager. Follow the steps below to update drivers.
Step 1: Right click on the Computer and click on manage.
Step 2: Now find the option Device Manager and click on that.

Step 3: Once done it will open device manager where you can find all the connected device to your computer.
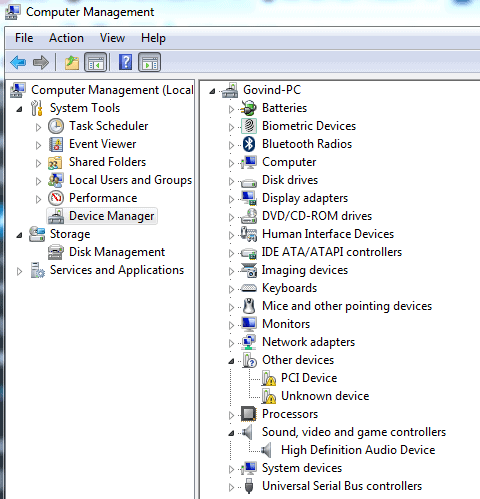
Step 4: Now click on the Sound Video and game controllers and inside that you will find High Definition Audio Device
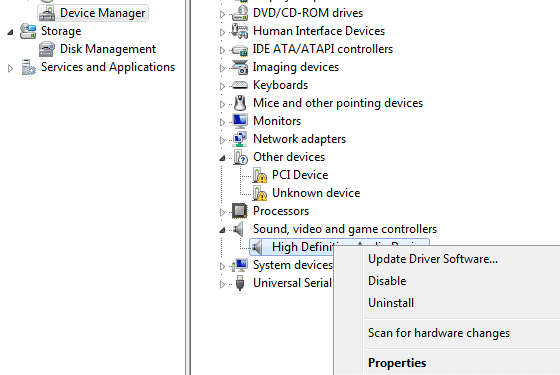
Step 5: Click on the High Definition Audio Device and Select Update Driver Software and your system will automatically start searching for updates.
Step 6: Once the driver is updated and installed you can restart your system.
Step 7: If Windows was unable to find the driver then download the latest Hyperx Cloud 2 drivers from here and extract the file
Step 8: Now again click on High Definition Audio Device and Select Update Driver Software. This time select browse my computer for driver software.
Step 9: Now choose the file which you have download in step 7. Now click on the next button and it will automatically install chosen drivers in windows PC.
Now your hyperx cloud 2 mic should be working. If you stil face some the same hyperx cloud 2 mic not working then you should better replace your headphone with another one. Sometimes it is possible that you hav got a faulty headphone.
Do you know? 5 Simple Steps : How to Speed up Computer and Make it Run Faster
No software can repair faulty devices so better replace it as soon as possible by calling customer service. Hope you get your solution from here.

