How to Root Moto G4 & Motorola G4 Plus Using TWRP Recovery
If you want to root the Moto G4 and G4 Plus, then you are at the right place. In this article, I am going to show you how to root Motorola G4 using TWRP recovery. But before moving ahead, let’s know something about rooting.
Rooting is the process of gaining administrative access on your android device. This allows you to go beyond the limitations set by the manufacturer. You can tweak system files, install custom ROMs, remove bloatware, etc. This is a great way to customize the Android device the way you want.
However, rooting also has some disadvantages. If it’s not done correctly, you can lose all your data or sometimes brick your device. So it should be done correctly. But don’t worry. Below is a step-by-step guide on rooting Moto G4 and G4 Plus devices.
Before You Begin
Before you proceed with the rooting process, you must prepare. Here are the things you need to do:
- Back up your data. This is crucial as rooting might wipe your device.
- Enable USB debugging and OEM unlocking in your phone’s settings. To do this, go to Settings > About phone and tap Build number seven times to enable Developer options. Then, return to Settings > Developer options and enable USB debugging and OEM unlocking.
- Download and install:
- ADB and Fastboot on your computer
- Motorola USB drivers
- TWRP recovery for Moto G4 and G4 Plus (twrp-3.2.1-0-athene.img)
- SuperSu zip file (save it on your phone’s storage)
How to Root Moto G4 & Moto G4 Plus
Now that you have done the preparations, you can proceed with the rooting process. There are two methods to root Moto G4 and G4 Plus. The first one is by using TWRP recovery, which we will cover. The second is by using Magisk Manager.
Both the method is simple and easy to follow. But this article will only cover rooting Moto G4 using TWRP recovery. So follow the steps below carefully and complete all of them.
1. Unlock Bootloader
The first step is to unlock the bootloader of your device. The bootloader is a program that runs before the operating system and controls how your device boots. By default, the bootloader is locked to prevent unauthorized modifications to your device.
But to root your device, you need to unlock the bootloader. This will allow you to flash TWRP recovery and SuperSu.zip file. Note: unlocking the bootloader will wipe all your data and void the device warranty, so proceed at your own risk.
To unlock the bootloader, follow these steps:
- Connect your device to your computer via USB cable. Make sure USB debugging is enabled on your device.

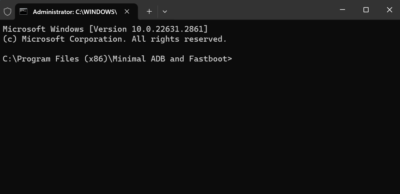
- Open a command window on your computer. To do this, go to the folder where you extracted the ADB and Fastboot files, hold the Shift key, right-click on an empty space, and select Open command window here.

- In the command window, type the following command and hit Enter:
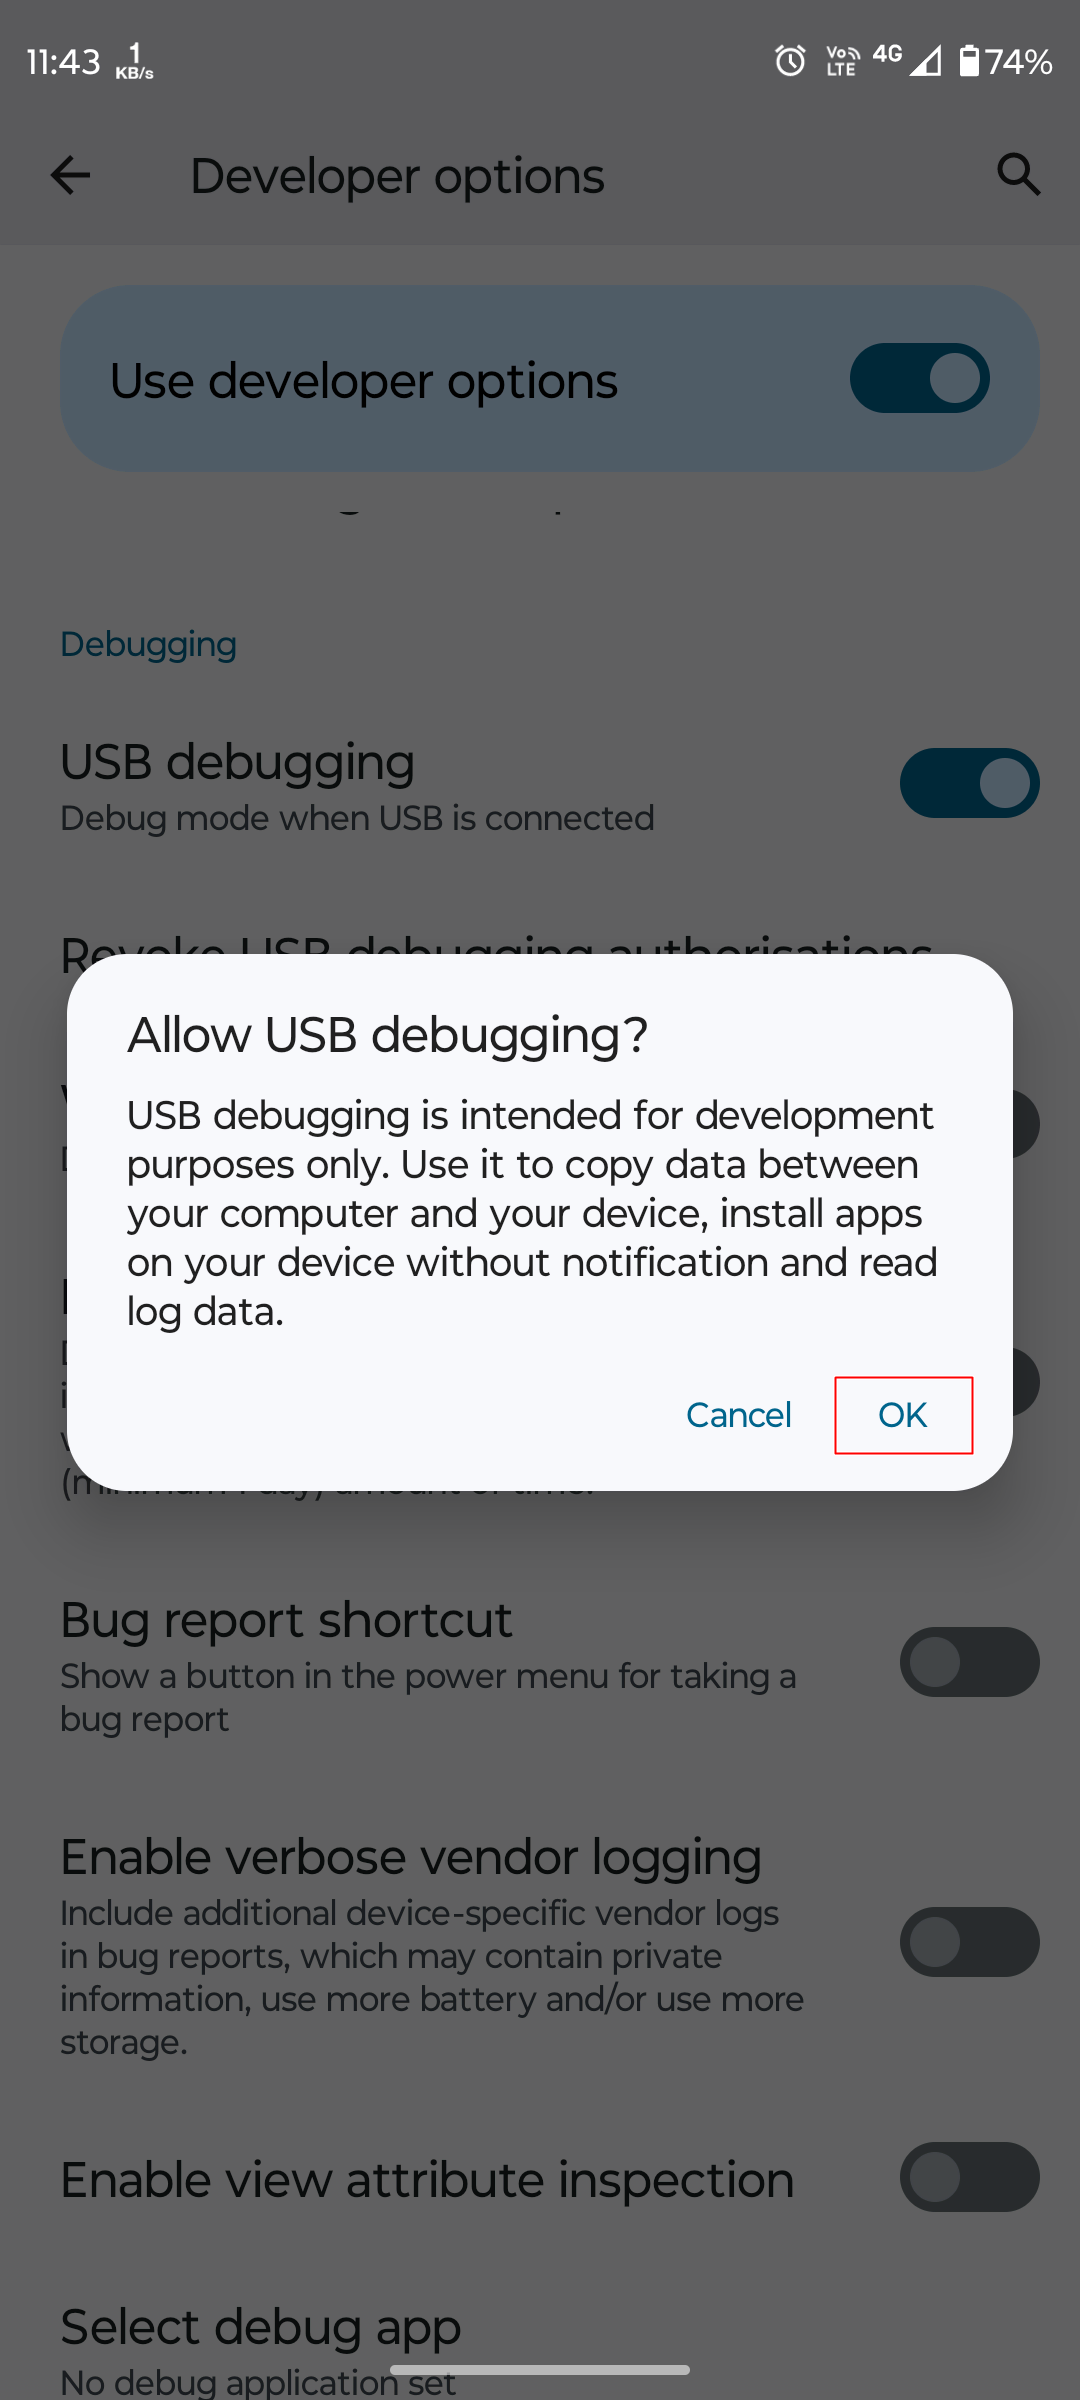

adb devices- This will show you a list of devices connected to your computer. You should see your device’s serial number followed by the word device. If you see unauthorized, you need to allow USB debugging on your device by tapping OK on the pop-up on your device’s screen. If you don’t see anything, you need to install the Motorola USB drivers and try again.
- Next, type the following command and hit Enter:
adb reboot bootloader- This will reboot your device into fastboot mode. You will see a black screen with some text and a logo of a green android lying down.
- Next, type the following command and hit Enter:
fastboot oem get_unlock_data- This will show you a long string of characters. You need to copy this string and paste it into a text editor, such as Notepad. Remove the spaces and the (bootloader) prefix from the string to have one continuous line of characters. This is your unlock data.
- Next, go to this website and sign in with your Motorola account. If you don’t have one, you can create one for free. Then, follow the instructions on the website to request the unlock code. You will need to enter your unlock data in the field provided and agree to the terms and conditions. Then, click on Can my device be unlocked? and wait for the confirmation email.
- Once you receive the confirmation email, open it and copy the unlock code. It will be a 20-digit alphanumeric code. Then, go back to the command window, type the following command, and hit Enter:
fastboot oem unlock YOUR_UNLOCK_CODEReplace YOUR_UNLOCK_CODE with the unlock code you received in the email. Ensure you enter the code correctly and do not include spaces or quotation marks. Then, hit Enter.
This will unlock the bootloader of your device. You will see a warning message on your device’s screen. Press the Volume Up button to confirm and the Power button to execute. Your device will reboot and erase all your data. This may take a few minutes, so be patient.
Congratulations, you have successfully unlocked the bootloader of your Moto G4 device!
2. Flash TWRP Recovery
The next step is to flash TWRP recovery on your device. TWRP is a custom recovery that allows you to perform various operations on your device, such as backup, restore, wipe, flash, etc. You will need this custom recovery to install the SuperSu zip file and root your device.
To flash TWRP recovery, follow these steps:
- Download TWRP recovery and place it in the folder where you installed ADB and Fastboot.
- Connect your device to your computer via USB cable. Make sure USB debugging is enabled on your device.
- Open the command prompt on your computer, type the following command, and hit Enter:
adb reboot bootloader- This will reboot your device into fastboot mode.
- Next, type the following command to flash the recovery.
fastboot flash recovery twrp-3.2.1-0-athene.img- Ensure you have the correct file name and it is in the same folder as the ADB and Fastboot files. Then, hit Enter.
- Next, enter the following command to reboot your device:
fastboot rebootOnce the device reboots, you need to boot into TWRP recovery. To do this, power off your device and press and hold the Volume Down and Power buttons together for a few seconds. You will see the fastboot mode screen again.
Then, press the Volume Down button twice to highlight Recovery mode and press the Power button to select it. You will see the recovery screen with some options.
Congrats, you have successfully flashed TWRP recovery on your Moto G4 or Moto G4 Plus smartphone.
3. Install SuperSu v2.82.zip
The final step to root Moto G4 is to install the SuperSu zip file on your device. SuperSu is a root management app that grants you root access and lets you manage the permissions of other apps. You will need to flash the SuperSu zip file using TWRP recovery to root your device.
To install the SuperSu zip file, follow these steps:
- Boot into TWRP recovery by pressing the power and volume down buttons together for a few seconds.
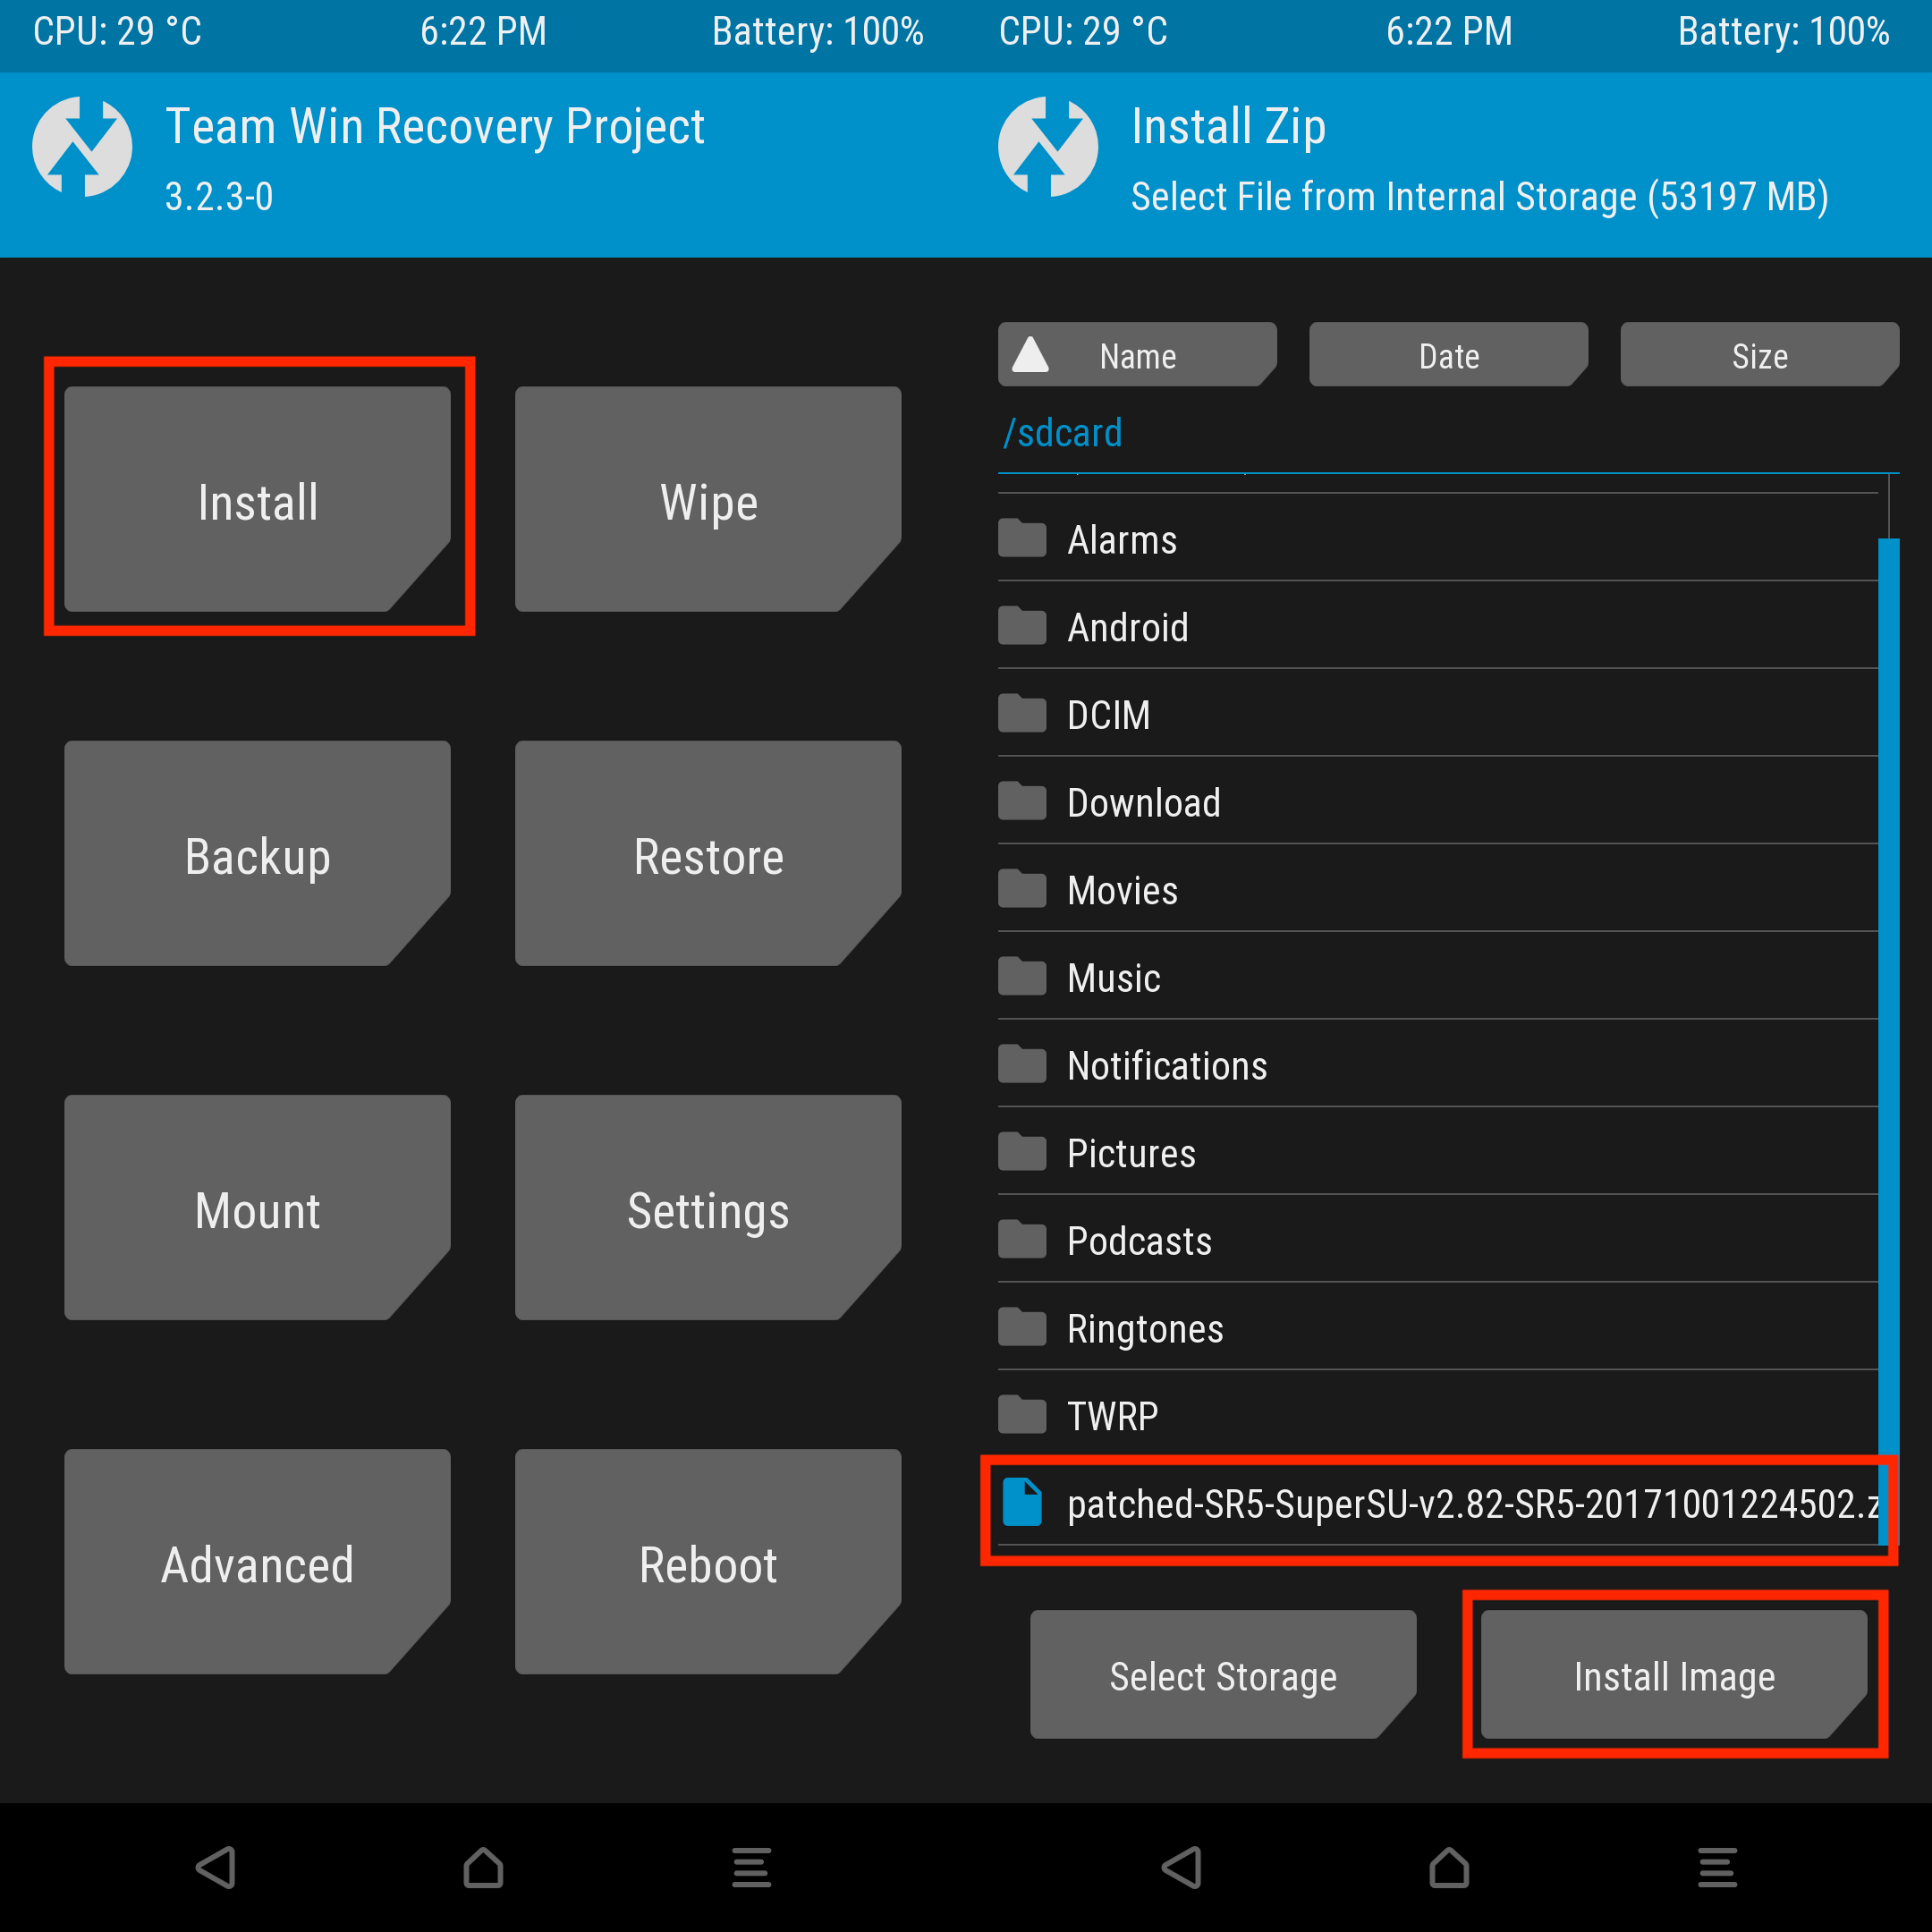
- Tap on “Install” and navigate to the SuperSu v2.82.zip file.

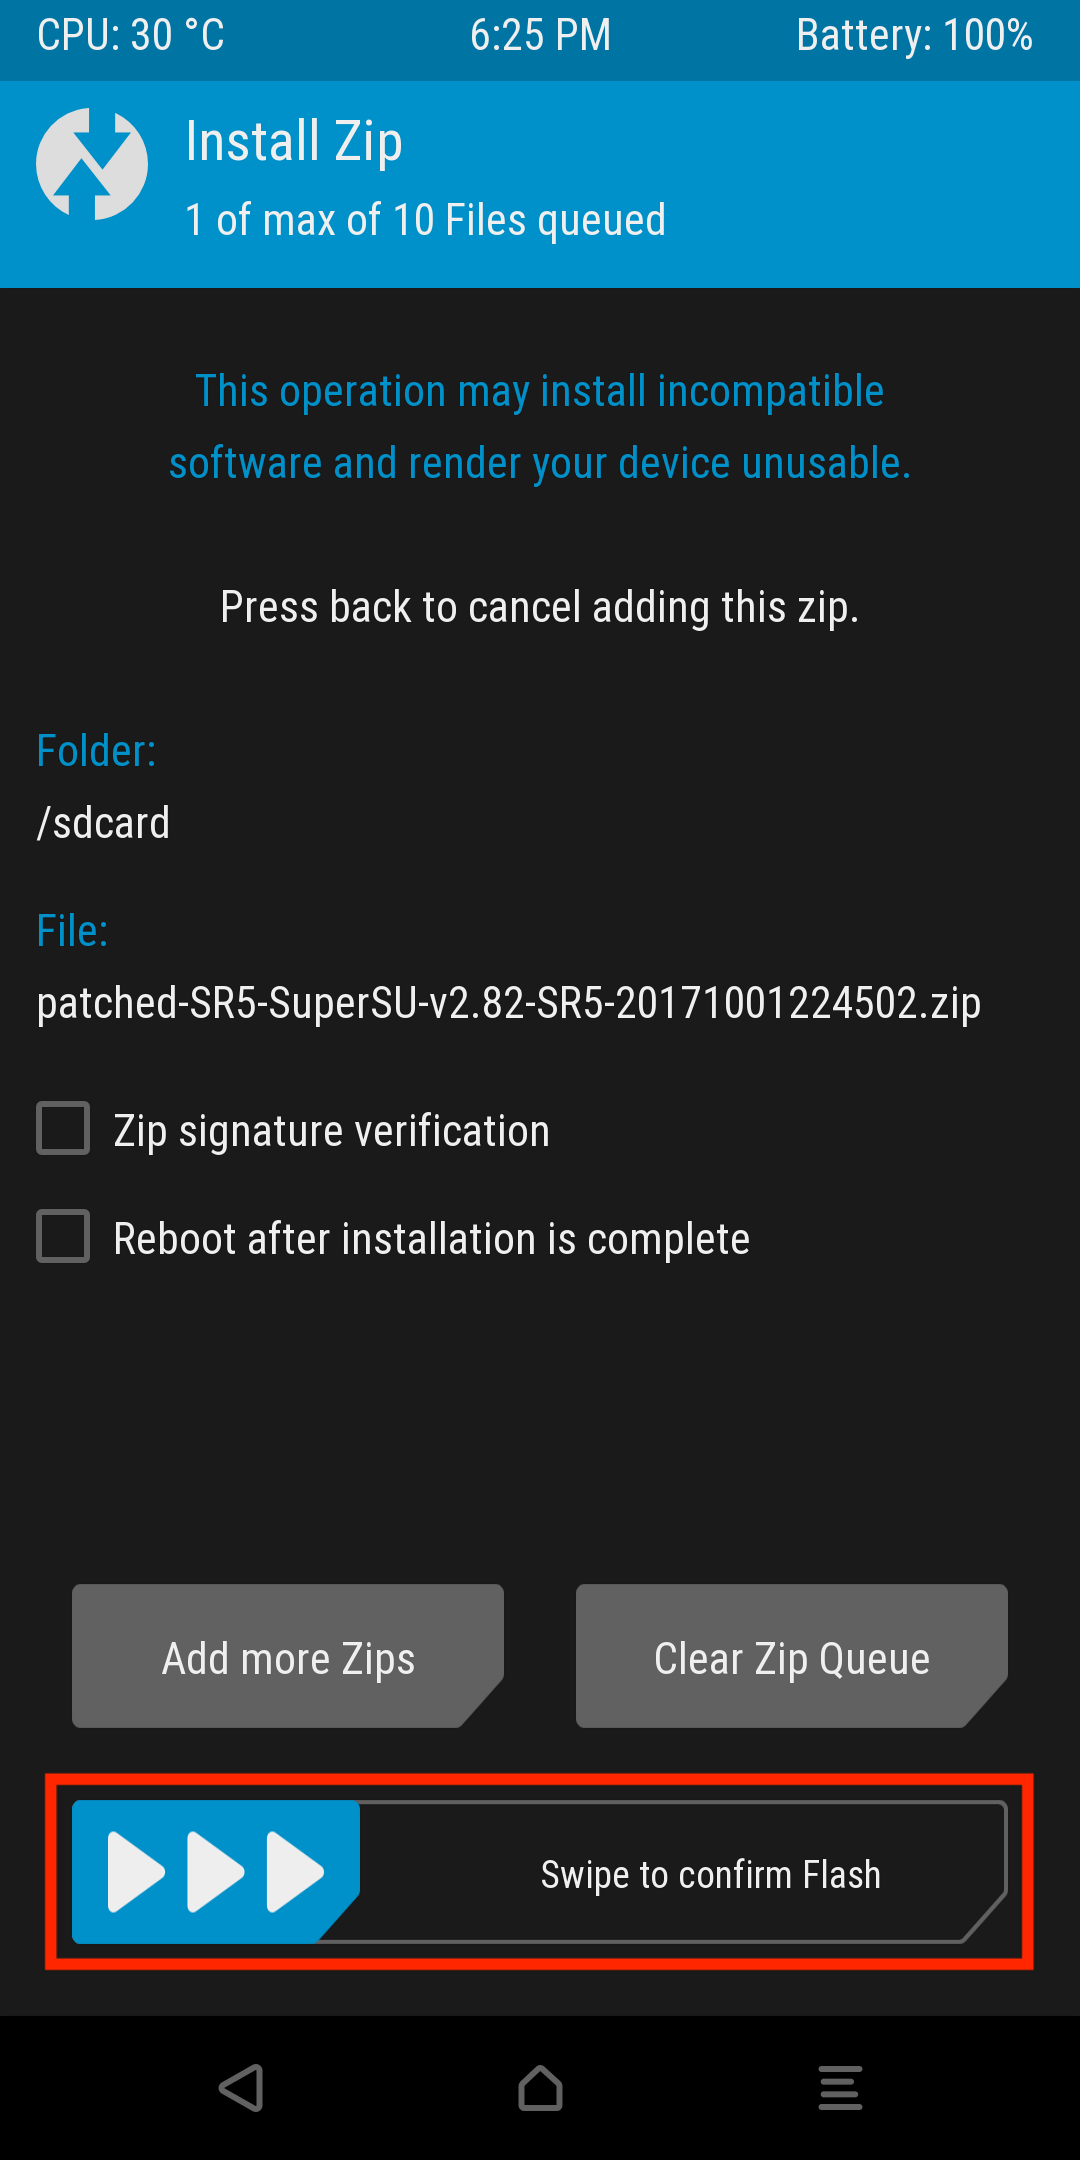
- Swipe to confirm the installation and wait for the process to complete.

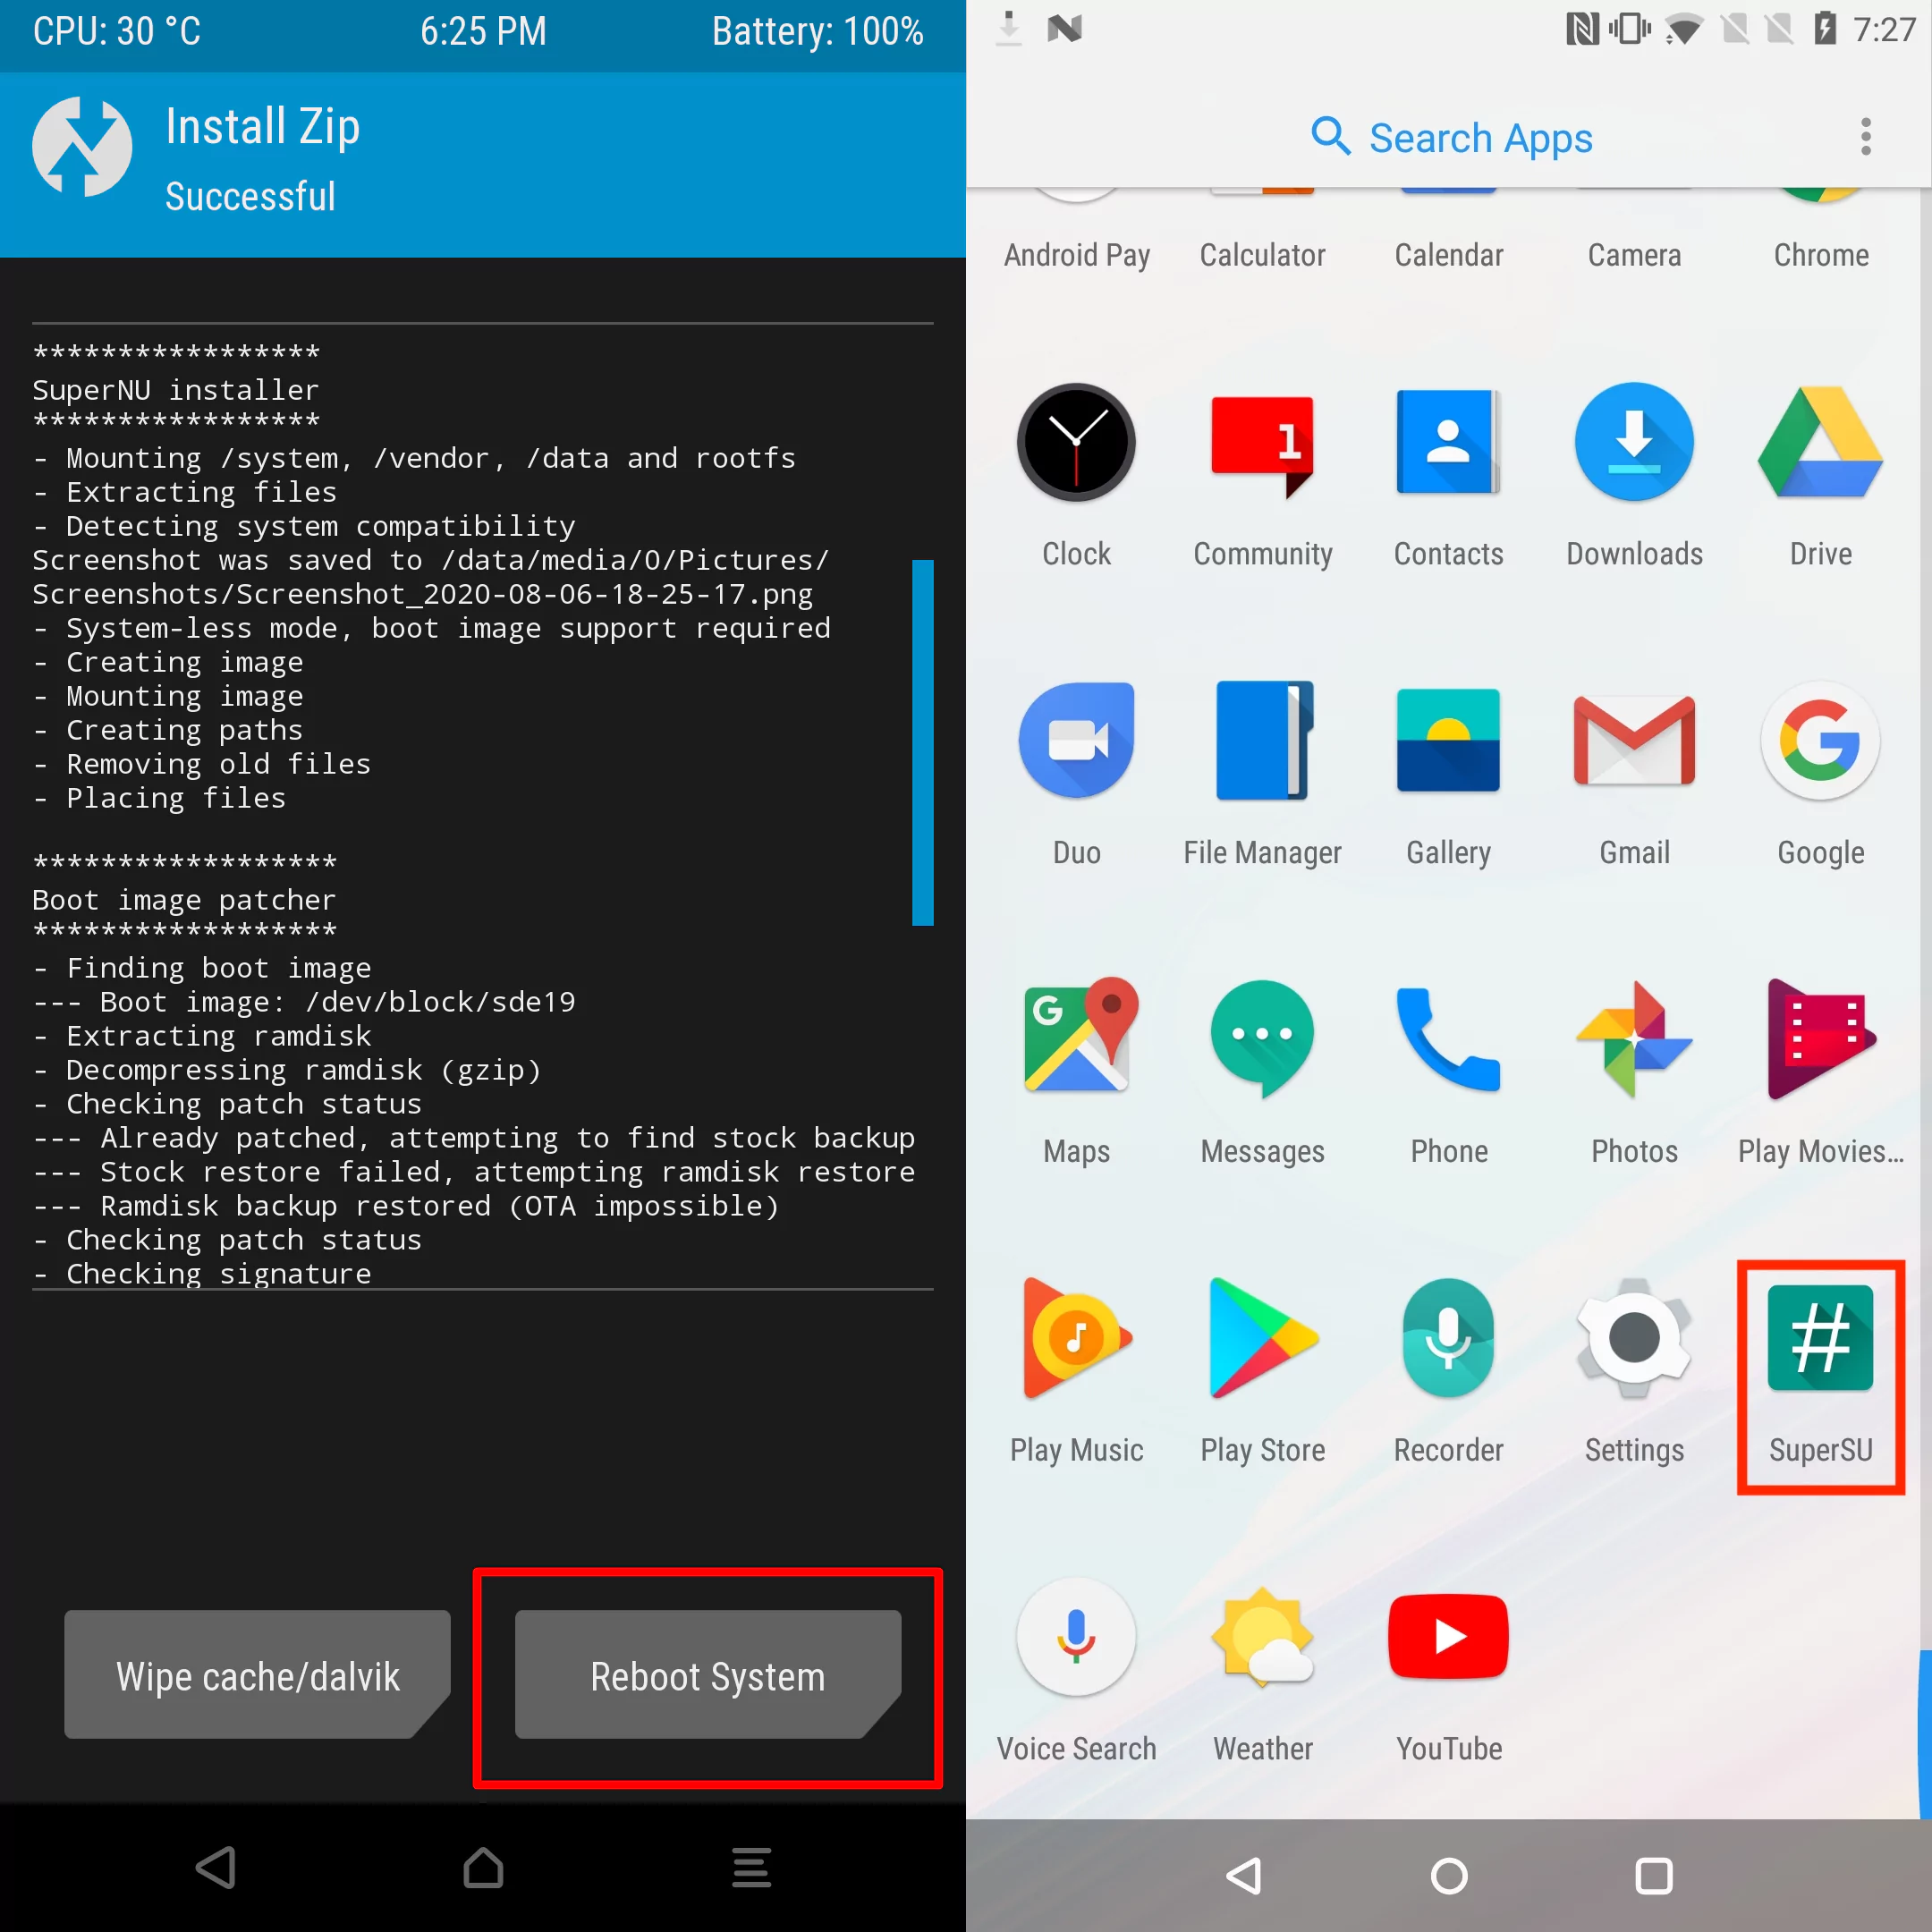
- Tap on Reboot System. Your device will reboot, and you will see the SuperSu app in your app drawer.
- This means you have successfully installed SuperSu and rooted your device.
Conclusion: Rooting Motorola Moto G4
Rooting an Android device gives you complete control but also comes with some risks and responsibilities. You should only root your device if you know what you are doing and will take the consequences. By rooting your device, you can access and modify the system files, install custom ROMs, remove bloatware, and much more.
However, it also voids the warranty and exposes it to security breaches. Therefore, you should always backup your data and allow the root permission to trusted apps only. Here are some of the best apps for rooted devices to get started.