How to Fix iPad Disabled Connect to iTunes Error in 2020
Many of the iPad users have face this problem at least one time in life. Even one of my friend recently face this problem because he forgot the password of her iPad. This is very common problem for iPad user caused by a human error.
If you try the wrong password to unlock iPad 6 time you will get the error “iPad is Disabled, Try again”. If you still enter wrong password multiple times you will face this error saying iPad is disable connect to iTunes.
Check This | 15 Best iOS Emulators For PC [Run iOS Apps on Windows] 2020
However, some users also complained that they are unable to restore iPad by connecting it to iTunes. Well i this post i am going to tell you how to fix the iPad is disable connect to iTunes error with 5working method.

5 Working Methods to Fix iPad Disabled Connect to iTunes Error

So lets go and have a look at the 5 best Working Method to recover your iPad from disable state. Well in all the methods you are going to erase your iPad so if you didn’t create a backup before all your iPad data will be going to erase.
Also Read | [Fix] HyperX Cloud 2 Mic Not Working in Windows 10
But if you sync your iPad with iTunes before occurring error iPad is Disabled connect to iTunes and still not perform a reboot. You can easily backup your data with iTunes. Follow the below step to backup disable iPad with iTunes.
Method 1: Backup & Restore Disabled iPad with iTunes
This option work only if:
- You have synced your iPad with iTunes before.
- If you restarted your iPad after occouring error you will need to again trust your iPad with iTunes which is not possible because you are locked out.
- Assume that you have not restarted your iPad and also have synced iPad with iTunes before.
- If you have Find My iPad turned on in the Settings on your iPad, you won’t be able to restore without going to the recovery mode.
To backup your disabled iPad with iTunes lets assume that you have already synced your iPad with iTunes and has not enabled Find my Ipad in the setting.
Step 1: Connect your iPad with the PC and open iTunes.
Step 2: From the upper-right corner, click the iPad device icon
Step 3: Click on the summary from left menu and click on “This computer” from automatically backup section and click on the done to start the automatic backup process.
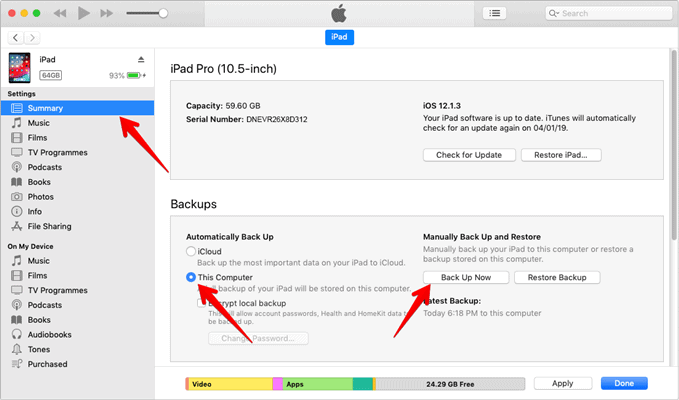
Step 4: Once the iPad backup is complted now click on the Restore iPad from the same tab. Also select the previous tab from Restore section.
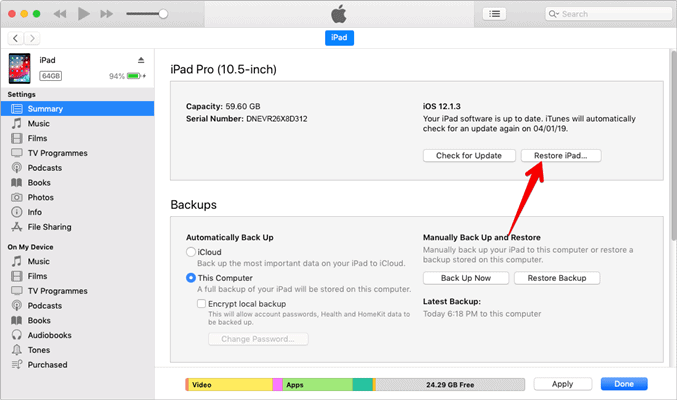
Step 5: Once the process is completed you will get your iPad back as lik as new.
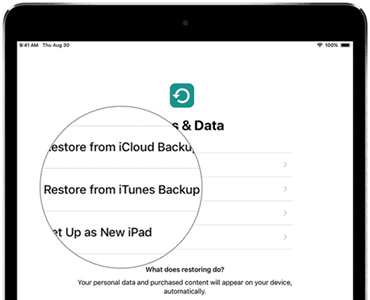
Step 6: Now begin the setup process on Ipad and click on Restore from Itunes. Once it has done you will have an unlocked iPad with all your data inside.
Thids is the safest way to bakup and restores your iPad from an earlier version without wiping your data.
Method 2: Restore Disabled iPad without iTunes Backup
If you not synced your iPad with the iTune before and also performed the restarting iPad then you can not restore iPad from iTunes Backup. In this situation, you need to restore your iPad with iTunes without backup.
In this method you are going to put iPad in recovery mode which is modern solution to all your iPad problems. This method is going to wipe all your data and setting on the iPad which also include a password.
Must Read – How to Install Kali Linux in Any Android Smartphone Under 5 Mins
If above methods doesn’t work for you and you are ready to wipe your data procced with this method.
Step 1: Connect your iPad with computer using a USB cable. Now install the latest version of iTunes in the computer if you dont have.
Step 2: Press and hold the Home button and Power button for 8 seconds until the iPad is turned off.
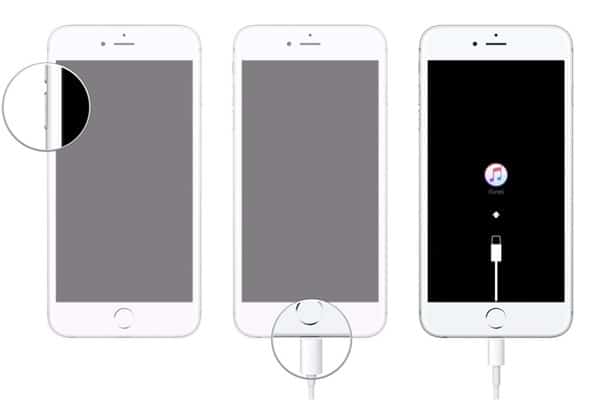
Step 3: Now release the power button but keep pressing the home button and connect the iPad to computer.
After going through above step iTunes will automatically takes your iPad in the recover mode. From here you can wipe all data on iPad which wil reset the iPad.
Method 3: Hard Reset iPad Manually
To fix the error iPad is disable connect to iTunes you can perform a hard reset. Even the apple forum replies that this could fix the iPad is disabled issue with ease. So perform iPad hard reset by following steps below:
Step 1: First of all Turn off the iPad.
Step 2: Now Press and hold the home button and the Power button at the same time until the screen turns black and the white Apple logo appears.

Step 3: After turning on the iPad check weather the issue has been resolved or not.
Method 4: Restore iPad using Cloud
If you have enabled Find My iPad before getting locked out you can restore your iPad with Cloud. To restore from cloud your iPad has to be connected with the internet.
Read Also | Mediacom Router Login Guide with Default Username & Password
Note: Before moving ahead make sure to take the iPad backup using the iTunes as shown in the first method.
Step 1: Login to iCloud.com using the Apple ID and Password you used on your iPad.
Step 2: Once you are in click on the Find iPhone
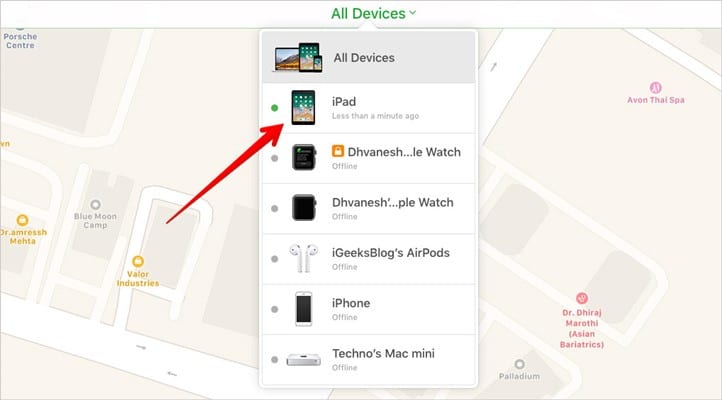
Step 3: Now select your iPad from the dropdown menu by clicking on the All device section.
Step 4: Now it will take you to the window where you can see the current location of your iPad and function like Erase iPad.
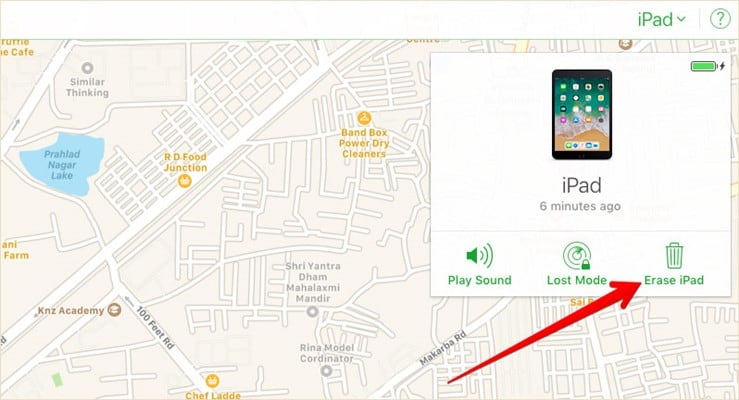
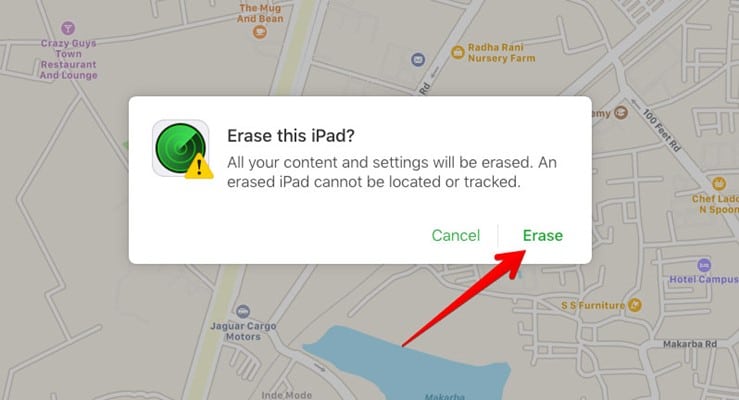
Step 5: Now click on Erase iPad and confirm by clicking the erase button again when prompted.
Step 6: Now you need to enter your Apple ID and password to confirm that its you. Also, you have to answer the security question which you had set up before creating an apple id.
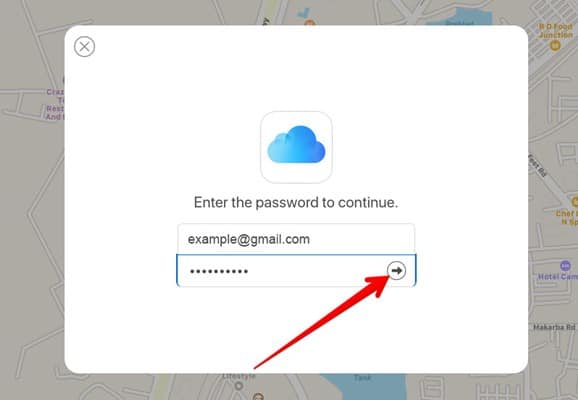
Step 7: Now click on the next button and within a few minuttes your iPad will be Erased and restart.
Now you can use your iPad without any iPad Disable connect to iTunes error. All you need to set up an iPad again before start using it. You can simply do it by entering your apple ID and password.
Method 5: Repairing iPad with FoneGeek iOS System Recovery
FoneGeek iOS System Recovery is the third-party tool which is used to recover the ios device from a deadly situation. This is the most preferred working method to repair any kind on iPhone and iPad easily.
With the help of FoneGeek iOs recovery Stsem you can fix:
- iPad is disable connect to iTunes error
- Downgrade your iPad to an earlier version if an iOS upgrade arise problems
- Fix all iPad issues, such as iPad get locked or stuck in recovery or DFU mode, etc.
Now you have understand that FoneGeek software can do a lot of task for you. All you need is download the software into your computer and follow the below steps to fix iPad disabled connect to itunes and other locked out errors.

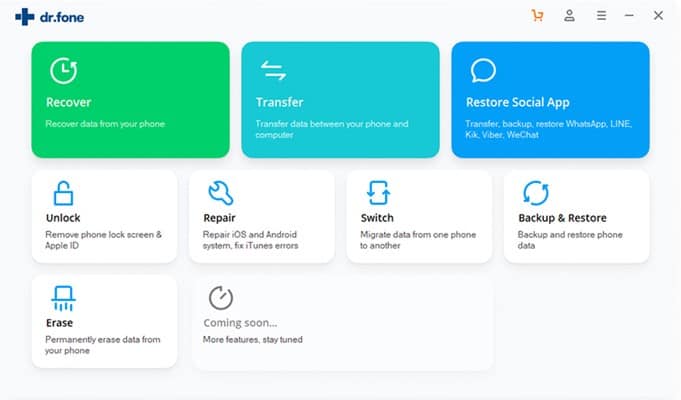
Step 1: Download and install the FoneGeek iOS System Repair feature to your computer.
Step 2: Now open the FoneGeek software.
Step 3: Now you need to connect your iPad to the computer so that the software will recognize your iPad. Since your iPad is disabled you can not simply plug your iPad to the computer. You will need to go to recovery mode using the power and hold button.
Step 4: Once you are in recovery mode connect iPad to computer and FoneGeek will recognize your iPad and present a screen just like below.
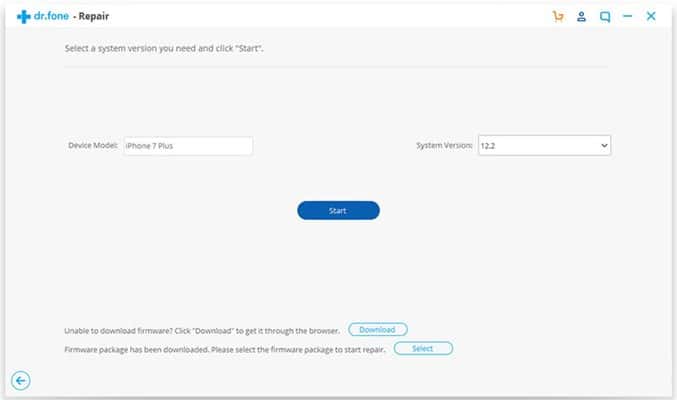
Step 5: Now confirm your iPad version from the screen and click on the Repair button.
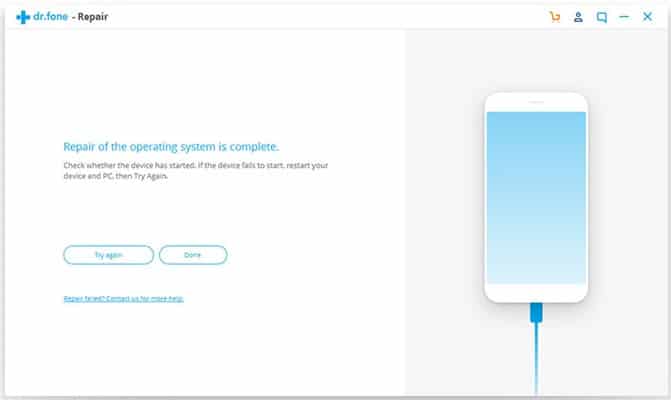
Within few minutes your iPad will be rebooted and you will not be prompted to enter the password again.
Wrapping Up
That all . Now you can use your iPad without any error. You can also use the Cloud option to remotely track your iPhone and other apple devices. This is very good feature provided by apple to tighten the security.
I hope now you have fixed iPad disabled connect to iTunes error in your iPad. Similarly you can also do with iPhone when you got locked out.
![10 Ways to Root Android Without PC in One Click [Root Apps]](https://techorhow.com/wp-content/uploads/2015/12/how-to-root-android-without-pc-400x228.webp)